Showing posts with label DIY. Show all posts

Friday, April 26, 2013

DIY Picture Ledge...on the cheap


Tis the end of April, and you know what that means?  FRANTIC SEARCHING FOR A NEW APARTMENT.  My current lease is up at the end of May, and even though I love my current place, it’s time for a change.  So that being said, I should probably post some of the things I have done around the place to make it look snazzy. 


I live in a loft, which means a whole lotta ceiling space (and echo potential, so don't make any noises you don't intend for anyone else to hear...including bodily functions...dad...).  What to do with all that excess wall?  Build a picture ledge of course.  I can’t take credit for this project, as I basically copied it from Ana White’s tutorial found here.   Basically, the shelf is made out of 8 foot long 1x2’s and 1x4’s. I bought the pre-primed boards, which cost an extra $5 but saved me in paint for a grand total of $18.  Cheap and easy just the way I like it (Sure beats Pottery Barn’s picture ledge, which looks the same and costs $110).


After assembling and mantling the picture ledge, fill it with artwork and other treasures.  I purchased all of my frames at IKEA or second hand.  Frugal Tip: Take the maps provided for free from the CTA and frame them.  I also purchased fun wrapping paper squares from Dick Blick and framed those too!  The paper only costs $3-5 and fits perfectly in a $5 IKEA frame.

Now you have no excuse for your bare ugly walls, so get to it.

Friday, March 29, 2013

{DIY Gift Wrap} Part 3: Personalized Paint Swatch Gift Tag


Hi my lovelies, sorry for the hiatus in gift wrap posts (I know, I know, HOW EXACTLY are you supposed to wrap your abundance of gifts without a new weekly tutorial???).  The last few weeks have been just too stressful and depressing for me to concentrate on my blog, but life must go on.

I’m going to cut to the chase; today’s tutorial is the paint swatch gift tag.  I hate spending money on gift tags, and I love me some free stuff.  If you’re a cheaparse thrifty like me, you’re going to love this tutorial.   Every time I’m at the Depot or Lowes I take the opportunity to collect my favorite color paint swatches; you just never know when they are going to come in handy.  My local Ace Hardware limits the amount you can take to 5…..the last time I was there I snatched 7 swatches. My palms underarms were sweaty and I was looking over my shoulder like a paranoid schizophrenic and/or meth head….I need to get out more.


Anyways, for this tutorial all you need is:
·         Paint swatch that has multiple colors (not just a solid square paint swatch….it will work but won’t look as fancy…)
·         Memories Slice Cutter (or similar)
·         String/Ribbon (to tie the gift tag to your package)

So basically, you just need a paint swatch with enough colors to spell out the person’s name that you’re gifting.  Example (Katie- Need at least 5 colors, if there are more you can cut the end colors off to shorten to swatch to 5 colors.  For this tutorial I spelled the name Masato, hence 6 letters/colors)


Really this is pretty self explanatory.  Center the slice on each paint swatch color and cut a different letter per color.  Easy peasy.  Attach the tag to the package with string or ribbon and you’re done.  (sorry this package looks a little…Christmassy….that’s probably because it was a Christmas gift…)

Wednesday, February 20, 2013

{DIY Gift Wrap} Part 2: Grocery Bag/Contact Paper Gift Wrap

Time for installment numero dos of the wrapping paper tutorials.  Today's tutorial makes use of contact paper, for personalized wrap! This one is mainly for those awesome people who own a slice or die cutter. You can always cheat and buy sticker letters, but where is the fun in that?


As everyone knows, I’m cheap.  I pretty much refuse to buy wrapping paper.  Paper bags of all varieties are my solution (I actually prefer brown paper bag wrapping to colorful wrapping paper…).  Thus, this gift wrap was accomplished using:
  • ·         1 brown paper grocery bag
  • ·         Leftover contact paper
  • ·         Slice machine
  • ·         Tape
  • ·         Scissors

Step 1: Wrap the gift with the brown paper bag

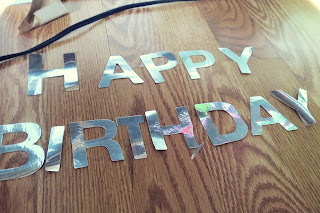
Step 2: Use the slice machine to cut out sticker letters using the contact paper.  I wrapped this gift for a birthday, but obviously you can use any phrase or slogan your little heart desires

Step 3: Arrange letters, remove backing, and place sticker onto the wrapped package


Step 4:  Make a bow out of the left over brown paper bag, using the tutorial found here

Step 5:  Give gift to birthday boy/girl, and watch them ooh and ahh over your pretty wrapping.  Then watch their look of disappointment when the gift isn’t as nice as the wrapping…womp womp….

Stay tuned for more wrapping tutorials!

Thursday, February 14, 2013

{DIY Gift Wrap} Part 1: Wine Bottle Wrapping (FREE!)


Happy Valentine’s Day lovelies! I hope you have amazing plans and are spending your day/night with that special someone.  I also hope you got said special someone a little token of appreciation.  Me…ermm…I haven’t gotten poor Nishy anything yet…but I still have a few hours before date night and I work in a mall.  So, fear not Sean, you will have a perfectly wrapped token of my love in T minus 4 hours.

Speaking of perfectly wrapped…are you wrapping illiterate? If so, today’s tutorial will be of use.  I love gift wrapping.  There is nothing quite like a gift that is wrapped with all of the bells and whistles.  Let’s face it: no one likes getting a gift that is wrapped in a plastic bag; it gives you the impression that the giver didn’t put much thought or effort into the gift (ahem DAD).  So to help all of you lazy ol gift wrappers out, over the next few posts I'll be highlighting some of my fave wrapping tutorials : )


Today's tutorial:  the Wine Bottle Wrap
I feel like I'm cheating with this post since it's so simple, but rather than pay $4.99 for a gift bag, just customize the brown paper bag you get for free with the purchase of wine/alcohol.  I used stamps, tissue paper, and curling ribbon.  Easy peasy (and FREE, so feel free to spring for the $$$$ wine, instead of the boone's farm...)


Enjoy your romantic night ya'll!  Check back later for more gift wrapping ideas : )


Thursday, December 20, 2012

{25 Days of Christmas} 9 Budget Friendly DIY Gift Ideas


I already mentioned one thrifty Christmas gift idea, with my hot cocoa post, but what are some other Christmas gift ideas for when you’re on a tight budget and want to be creative?  I can’t post all of my ideas since some people haven’t gotten their presents from me yet.  But, below are some of my favorite gift ideas for the DIYer with a small wallet and a little free time: 


Top Row (Left to Right):
Center Row (Left to Right):
Bottom Row (Left to Right)

Do you have any DIY gifts you would like to share?  Feel free to email me if you do, I would love to share on my blog!

Wednesday, December 19, 2012

{25 Days of Christmas} DIY Christmas Cards


Christmas:  The time to scramble around and send out last minute Christmas cards.  Oh wait, that’s just me.  Most people are on top of things and have their cards out in early December.  I, on the other hand, mailed mine…erm….today.  Whatever, getting your Christmas card after Christmas…NBD.   You’ll live.

So, for the past few years I have tried to make my own cards.  I have never really been one for scrapbooking; I don’t have a silhouette or a cricut. I love the look, just don’t have the tools. So I usually have to be resourceful.  This year I used leftover cardstock and a stamp.  As usual, I inflicted my rotten humor onto my friends (Home Alone anyone?).  I just can’t handle sappy quotes.  Not my style.


Here are some cards that my Christmas cards are jealous of.  So much prettier and better thought out:

Right (Top to Bottom): 

If you haven't sent out your Christmas cards yet, you should probably get to it!  Only 6 Days left till the big day!

Tuesday, December 18, 2012

{25 Days of Christmas} DIY Glitter Bamboo Tree


When I started decorating for the holidays, I spotted a gorgeous holiday decoration at Nordstroms.  Of course my first thought is that I could make a cheap version of the same tree (even though it wasn’t THAT expensive).  This project would be easy to make with the kiddos. 


Materials Needed (Makes a 10” Tree):
3 Craft Foam Sheets
1 10” Bamboo Skewer
1 Small Paper Plate
Glue Gun
Elmers Glue
Gold Glitter Paint/White Glitter
Gold Paint
Scissors
Leaf Print Outs of Various Sizes (Small, Medium, Large)

Directions:
1. Print out the shape of leaf you want for your tree, and glue onto the foam with elmers glue. If you have a fancy printer, perhaps you could print directly onto the foam, however I do not, so glue it was. You could also consider free hand drawing or cutting the leaves.  I used three sheets of foam, and that was just enough leaves (I had a few leftover).


2. This is where the kids are handy!  Get some kid friendly fiskars, and cut the leaf shapes.  Once cut, remove the paper print backing.

3. Apply glitter glue and glitter to each leaf (I used glitter glue and glitter, but you could just skip this step, or apply your elmers glue and glitter)


4. Take your paper plate and cut off the paper rim, so all you have left is a dome (if turned upside down).
5. Paint the bamboo skewer and the  bottom side of the paper plate gold.


6. Once the paint and the leaves are dry, start assembling.  Just take the leaf and skewer it up the stick. Assemble from smaller leaves first, finishing with larger leaves.  There is no need to glue the leaves on, as the hold is adequate from just skewering.

7. Move bunches of leaves about ¾ inch apart, so it looks like a Christmas tree.
8. With the paper plate gold side up (making a dome), punch the pointed end of the bamboo skewer through the center of the plate.

9. Hot glue the bamboo stick on the now bottom of the plate (the non gold side).  Allow to cool, and then sit it upright, and you have a foam crafty Christmas decoration! 


Here is the foamy goodness result:


 Only one week left till Christmas!  It's crunch time folks!


Monday, December 17, 2012

{25 Days of Christmas} DIY Hot Cocoa Gifts


Oh man, the 17th day of Christmas almost never was!  I was so busy shopping today I ALMOST forgot about my blog post.  But don’t worry.  I remembered. 

What’s the best thing to come home to after a long day of Christmas shopping (aside from a glass of champagne and a spa treatment)?  A nice warm mug of hot chocolate.  Hot chocolate is not only the perfect winter treat, but also makes a great gift or stocking stuffer.

Behold an amazing recipe for hot chocolate, courtesy of Alton Brown (cayenne pepper, who knew??)

Ingredients

  • 2 cups powdered sugar
  • 1 cup cocoa (Dutch-process preferred)
  • 2 1/2 cups powdered milk
  • 1 teaspoon salt
  • 2 teaspoons cornstarch
  • 1 pinch cayenne pepper, or more to taste
  • Hot water

Directions

Combine all ingredients in a mixing bowl and incorporate evenly. In a small pot, heat 4 to 6 cups of water.
Fill your mug half full with the mixture and pour in hot water. Stir to combine. Seal the rest in an airtight container, keeps indefinitely in the pantry. This also works great with warm milk.

And here is a little packaging inspiration:

Top Row: S'mores Cocoa Cone / Hot Cocoa in a Can (get the can for $1 at Target!)
Be sure to check back daily for holiday inspiration!  As a special treat to my readers, I'm offering a 10% discount in my Etsy store with the discount HOLIDAY10.

Thursday, December 13, 2012

{25 Days of Christmas} Silver Thumbtack Wreaths


Are you ready for ANOTHER wreath tutorial?  I hope you said yes, because that is what you are about to get.  This entire project only cost me $8 in supplies, since I had most of it on hand (it didn't actually cost me any money since my mom picked me up the thumbtacks, thanks moms!!!)


So anyways, I saw Madigan Made’s thumbtack wreath a while ago and have been jonesing to make one for myself.  What better time than Christmas?  The best part about this tutorial is that the wreath is versatile and can be hung during virtually any season; the little thumbtacks almost give a snakeskin/hammered metal appearance.  Loves it!

Disclaimer:  I cannot be held responsible if at the end of this project you get the urge to stab someone with thumbtacks and rip your fingers off.  It is super repetitive and boring, but sitting yourself down with a glass of wine and the movie elf may help to alleviate the monotony.

Materials:
-Cardboard
-Magazines/Newspaper
-Duct Tape
-X Acto Knife
-Silver Thumb Tacks (My 3 6” wreaths used 750 tacks all together, tacks are available at the Dollar store typically in boxes of 200 or 300)
-Ribbon for hanging

Directions:
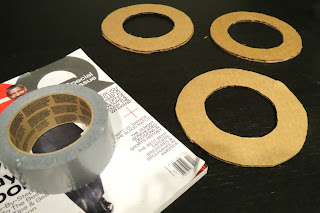
1. I used the same steps to make a wreath form as I did with my moss wreath.  First, I printed off a 6” circle using Microsoft publisher, then I glued the cut out to the cardboard.


2. Carefully cut out the cardboard shape using the xacto knife. (Do this 3 times to make 3 cardboard wreath bases).  Obviously if you're lazy you can buy foam wreath forms, but I'm cheap and am trying to be green.

3. Crumple up newspapers and magazines, then tape the magazines to the cardboard using the duct tape.  Try to make all 3 wreaths uniform in shape and size.

4. Start poking the thumbtacks through the wreath form.  No glue necessary.  I didn't have a specific pattern, however I found it easiest to work from the inside of the form outward.

5. Continue this process until the entire wreath is covered in thumb tacks (each wreath used around 250 tacks).
6. Optional:  Get your favorite holiday ribbon, make a bow and tie around the wreath for hanging.

And here they are!  Even the boy liked them.  I would say that is a success!


Be sure to check back daily for more holiday inspiration!  As a special treat to readers, I'm offering a 10% discount in my Etsy shop, just use the code HOLIDAY10!

Monday, December 10, 2012

{25 Days of Christmas} Unconventional Christmas Trees


I know I've mentioned multiple times that I don’t have a Christmas tree this year.  What I really should be saying is that I don’t have a traditional tree.  This year, since my tree is whoknowswhere, I needed to get creative and re purpose some piece of furniture into a tree. 


Say hello to my ladder tree.  No doubt if you are on pinterest you have seen the ladder trees of Christmas past (I was inspired by CB2’s tree).  It’s pretty simple, all I did was string on some white lights, tie some cotton twine and hang a few gold round balls, stick an angel on top, and call it a tree.  Loves it.  Easiest tree (and perhaps my favorite???) ever! The cats like it too…they climb the stairs and pretend they’re Godzilla while knocking down the angel.  They may or may not have chewed off one or two of the ornaments as well…..


Some other alternative Christmas tree ideas that I love:


Top Row, Left, Clockwise:
Post it note tree / A Merry Mishap's Light Tree / Branch Tree / Tomato Cage Tree /
Jane's Wall Collection Tree /
Crockery Christmas Tree / Tierlantijn wood plank tree / Sweet Paul's Cupcake Tree

Be sure to check back daily for more Christmas tips and cheer!


Friday, December 7, 2012

{25 Days of Christmas} DIY Ornament Garland


Remember last year when I had more round ball ornaments than humanly necessary?  No?  Well I do.  I put them to good use by making an ornament wreath (which is proudly hanging from my front door right now).  Well, the ornament wreath put a dent in my collection, but what to do with the masses of round balls I have left (aside from hang them on a tree, which I don't have)?

Make ornament garland of course!  I made this garland to hang from my balcony ledge.  I just strung the ornaments in a semi consistent pattern, tied the ends of the cotton string to nails, and nailed the string to the brick and wood ledge.  I then covered the nail heads with wire ribbon bows.  Pretty easy, and didn't cost me a dime since I had it all on hand!


Some other bloggers with ornament garland to DIE for (much prettier, better tutorials, and more effort than mine!):


Left Row (Top to Bottom):

So now you're inspired and are getting ready to head out to the dollar store right?  I knew it!  Be sure to check back daily for holiday ideas and tips!  As a special treat to readers, I'm offering 10% off at my Etsy store, just use code HOLIDAY10 at checkout!

Thursday, December 6, 2012

{25 Days of Christmas} Homemade Ornaments


Every family is a little different when it comes to decorating Christmas trees.  Take for instance, my clan.  I’m pretty sure every Hallmark ornament ever created is owned by someone in my family, it borders on obsessive collecting.  I like the Barbie ornaments…too bad my Christmas tree is lost in storage somewhere….

If for some reason you don’t have any ornaments to decorate your tree, and you’re not quite feeling the Charlie Brown look, consider making your own!  Below are some of my favorite DIY ornaments, click on the links to find the tutorials for each ornament. 


Happy Holiday DIYing!  Be sure to check back daily for more holiday ideas!  As a treat for my readers, I'm offering a 10% discount in my Etsy shop, just just the code HOLIDAY10!

Wednesday, December 5, 2012

{25 Days of Christmas} DIY Paper Mache Holiday Deer Head


Please be advised:  No animals were harmed in the making of this holiday decoration.

Everyone, say hello to Lil Wayne, the newest addition to Apt. 913.  Isn't he just the cutest?  All he is missing is a shiny little red ornament nose and he will be complete! Maybe I should give him a grill.....

ANYWAYS, I have wanted to make a cardboard deer head for awhile now, but I really had no room or need for a cardboard animal decoration...UNTIL NOW! I knew as soon as I saw Pottery Barn's Resin Stag Head Christmas decoration, it was on.  $299 PB Head, meet Kaitlin's FREE Lil Wayne.
Pottery Barn's Resin Stag Head $299

Materials:
-Cardboard or foam board (Foam board looks prettier, but cardboard is easier to cut)
-X Acto Knife
-Elmers Glue
-Tape
-Newspapers or Magazines
-Paint
-Wrapping Paper
-Flour

Steps:
1.  Go to Chronicle Books Blog.  Print out the deer head template, and follow her directions for building the deer head cardboard foundation.  I used foam board leftover from my cat bed project, but I think ultimately if you are going to paper mache you can use cardboard since it is easier to cut, and you wont see any of it when it is covered with wrapping paper.

2. Glue the pieces together to create a sturdier foundation.

3.  Begin forming your deer head and neck by crumpling up magazines/newspapers, and taping them to the cardboard deer form. As you can see I added some ears to my deer...and I attempted to add eyes, which made wayney boy end up looking like an alien....


4. Cut strips of wrapping paper for the papier mache. 

5. Prepare the papier mache mixture. I boiled together 1 part flour to 5 parts water.  It worked well.  The first time I made the mixture it was a little clumpy.  The second time I got it right.  Boil the mixture while continually stirring.  Once it looks liquidy or almost soupy it is ready.  Transfer the mixture to a cool bowl, and allow to cool for a minute or two. 

6.  Dip your wrapping paper into the papier mache mixture.

7.  Begin covering the head and antlers with the paper. Smooth your strips down, and try not to do any more than 4 layers. I did half the head in one sitting, allowed it to dry, then worked on the other half. 

Please excuse my man hands! Part woman, part horrible beast.

8. While your deer baby is drying, cut a shield out of cardboard, then paint with a color of your choice.  I chose a burgundy color.  I reinforced the back of the shield by gluing on a second piece of cardboard.

9. Once the deer is dry, and the paint from the shield is dry, attach the deer head to the shield.  I was tired of gluing and ended up just nailing my head to the shield, but of course you can use glue, or whatever other means of attachment you can think of.

10.  To finish him off I put my moss wreath around his head and called it a day (until I remembered I forgot the red nose! womp womp)

Anyways, this is le monsieur Wayne. Loves him in all his wrapping paper glory.


Be sure to check back tomorrow for more holiday ideas and DIYs!
Pin It button on image hover