Sunday, July 31, 2011

Rhinestones and Studs and Spikes...Oh My! DIY Christian Louboutin

July 31st is typically an insignificant date to most....but it is pretty important to me.  Why is that, you ask?  Cause I officially finished my first rotation!!!  One down, 10 more to go....
All together now:  "Hallelujah!" 
(Public Plea: PLEASE cross your fingers, rub a rabbit's foot, and throw some salt over your shoulder...wish me luck...I may or may not have passed my end of rotation exam....)

All in all, I enjoyed Internal Medicine.  Even though the hours were LONG I still had a great experience.  I had fantastic patients and preceptors that really showed me the meaning of a patient/provider relationship.  I still have SO much to learn, but I'm off to a great start....now on to OB/GYN!

Moving on......as everyone knows by now, I have a penchant for shoes, more specifically red soled 5 inch heels.   I don't care if my feet bleed, my toes scream, or pedal edema spreads all the way to my brain...I have to have them.

About a year ago I discovered my inspiration:  Christian Louboutin Very Mix Platform Heels.  Price: $3,500  Being that my bank account was and still is, in the double digits, I needed to get resourceful.  

Step 1:  Gather Materials
  • The original "Very Mix"  is covered in Swarovski Strass "Comet Argent" crystals.  Nope nope, I cannot stomach paying hundreds of dollars for crystals.  
Good alternative:  Silver rhinestuds purchased via ebay in the following sizes (Size is really a matter of preference, this is just what I used....) $7 including shipping
    • 2,880 6ss
    • 2,880 16ss
    • 288 20ss
  • Leather hole punch- $5 ebay
  • Spikes:  5/8" silver spikes, and 0.5" silver spikes purchased from studsandspikes.com ~$10
    • At the time of purchase I didn't realize how long the spikes I purchased really were.  In retrospect I would have used shorter tree spikes....but hey it is what it is!
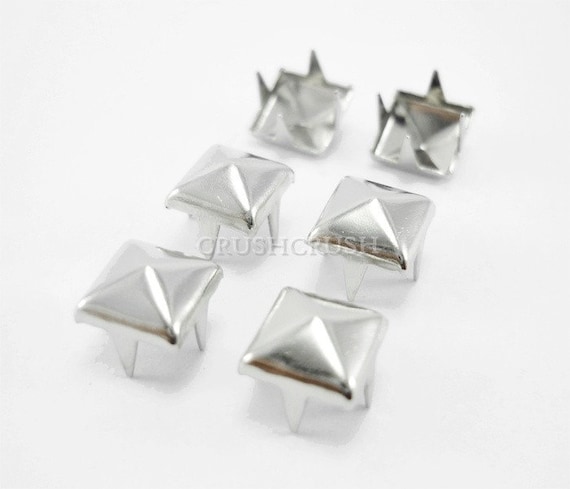
  • Studs:  I purchased the triangle studs off ebay, a package of 100 for $3.00.... I hunted high and low for  pyramid spikes...couldn't find them anywhere.  Guess what? You can now purchase them on studsandspikes.com for $13.44 for a bag of 20 or $0.96 each

  • Shoes:  I got a fantastic deal on a pair of silver heels from sheikh shoes- Style:  Ingrid-2...Price $14.00 after coupon code   (now they're going for $21.97 http://www.shiekhshoes.com/p-27474-womens-ingrid-2.aspx)
  • Glue:  Trusty E6000, 2 tubes $6
  • To make life a little easier you might want to consider purchasing syringes to put the glue into...I got mine from walmart in the baby aisle $2
Step 2:  Punch and screw
Take leather hole punch, punch holes in shoes where you want the studs placed, screw in studs...now you might be thinking:  Don't the backs of the spikes rub against your feet?  My answer to that is...possibly, depending on the placement.  In my case, the screws didn't bother my feet one bit.

Step 3:  Use hole punch to punch new holes into belts from your skinny glory days.....Sorry I got sidetracked....this hole punch is USEFUL!

Step 3 (For realz): Pyramid stud placement.
The pyramids I used had little prongs on them.  They didn't penetrate the leather very well, so I ended up using a wire cutter to cut them off.  Using the E6000 I scattered and glued the studs to bare areas


Step 4:  Glue till you can't glue no more.  Caution:  the glue is NOXIOUS. Make sure you have good ventilation.
I used a bobby pin with sticky tack on the end of it to pick up the tiny rhinestuds.  Companies do make wax sticks or you can always use tweezers, but I used what I had on hand.  Remember:  Be resourceful!

I didn't use any real pattern for my rhinestones, I tended to put the larger stones on first, and then filled in the gaps.  Some people use a specific pattern.  It's really up to you!

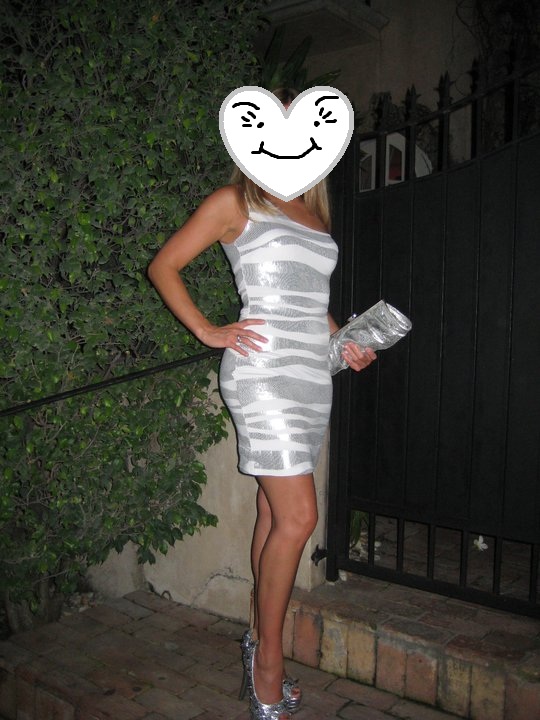
Step 5:  Get a Pedicure cause people are going to STARE.
Don't mind the mess in the background...and the super trendy pink carpet
Final total:  $47 including tax and shipping.....$3,453 off retail price
Step 6:  Make a pair for your sister, cause she deserves some foot candy too.  HAPPY BIRTHDAY E!

Step 7:  Click your heels three times, and wish you were anywhere but the hospital......

Sunday, July 17, 2011

What you see....is what you get?

Let me start off by saying HOLY COW IT HAS BEEN A BUSY MONTH.  My home decorating activities have been put on temporary hiatus due to the bane of my existence: clinical rotations.  I've been in Internal Medicine for the past two weeks, and it has been a real eye opener.  I'm not so sure I want to do IM when I'm done with school, but I have for sure seen some very interesting things......

Things I've learned thus far:

This is what my patient looked like.....DONT DRINK ETOH YO!
  • Christian Louboutin flats are not appropriate footwear for 13 hour pukey workdays
  • Every fax machine in Cook County Hospital is busted
  • My spanish is RUSTY and hola doesn't quite cut it.....
  • Don't complain to moms and pops about 80 hour (okay 77 hour...who's counting??) work weeks, their response will be welcome to the real world (I for one was planning on my real world consisting of mojitos and sandy beaches...)
  • A patient that has alcoholic cirrhosis probably isn't pregnant, they just have LITERS of excess fluids (my patient's case --> 6L!!!!)  
Anyways,  I'm able to post today because I have what is known to medical residents as a "golden weekend" meaning I get both Saturday AND Sunday off this week!  What a treat!  You don't appreciate your weekends until they are abruptly and maliciously stolen away from you.  I'm most definitely living up my weekend, because I have two overnight calls this week...meaning I'll be at CCH from 6am-11am the following day.  Warning to anyone wanting to chit chat or shoot the breeze with me this week:  don't.  I will take no responsibility for biting your head off and spitting it out Ozzy Osbourne style.  You've been warned.

Moving on.

As you all know I recently made a trip to Meami to visit my spoiled rotten sister.  What you may or may not know is that she has two little furball children that are also spoiled rotten.  I adore my little niece Cleo and nephew Cesar and am quite jealous of their beach front view.  They also have quite the bathroom arrangement.  A few years back my sister purchased the kitty litter lounge for $70.


Needless to say, my Rishi and Rajah were quite jealous of their cousins' bathroom palace. My poor kitties had to do their business in the middle of the room, with everyone watching.  I think they were embarrassed to go to the bathroom.  It was time for a change, and my sister's litter box lounge was the inspiration. 

I hunted thrift stores and estate sales for a tall cabinet like the one above, with no luck.  UNTIL I came across this masterpiece...a little short and a little ugly....but it just might work:  
My mom and I had been comfy shoe shopping, and we were in the Cavalier....we weren't so sure it would fit.  So I just tossed it in the "it wasn't meant to be" pile and left the poor cabinet sitting there unpurchased....of course I tossed and turned overnight thinking about the cabinet.  The next day I went back with my mom and SUV....it was still there.....you're never going to guess how much it cost....okay guess......

37 cents including tax.  No, your eyes aren't wonky, you read that right.  37 cents.  The cabinet was marked $0.99, and it was 66% off day.  Thank you furniture gods.  I guess it was actually free, because my mom bought it for me.  She is too generous.

Now onto the renovation
Step 1:  Remove doors and Sand.  This was much more difficult than expected.  Turns out the top was made from some weird laminate and wasn't easily sanded.  Womp womp.

Step 2:  Cut kitty entrance on the side.  I used the measurements from the kitty litter lounge6 1/2" W x 7 3/4" H.  Then I measured the height of the litter box to know how high to cut the hole from the base of the cabinet.

Step 3:  Paint.  I originally wanted to stain the box a dark ebony color to bring out the natural elements of the wood and give it a more rustic look, but the laminate top put the kabosh on that plan.  Plan B:  Rusteolum Black Glossy Spray Paint (3 cans)- $10.00  All 3 cans were enough to cover the box, doors, and hardware.

Step 4:  Reassemble, place kitty litter box inside....hope cats enjoy.......

The final result:  I'm very happy with the way it turned out....I'm still planning on changing the gold velour under the doors...but until I find a fabric that catches my eye...this isn't too bad.  The cabinet works great for masking potty odors, and also serves as extra storage for kitty goods.
Rishi very happily enjoys the comfort of his own private bathroom

Not too bad for $12 and a little love.


Saturday, July 2, 2011

River Rock Mat

One three hour flight, and 40 minute blue line ride later, I'm back in Chicago.  
So long Miami, it was nice while it lasted. 

I just spent the week visiting my sister in FL, and it was ah-mazing.  I frequently toy with the idea of "homeless beach bum" but the designer shoe urge overcomes me, and I'm back to reality.  So, since I can't live near the beach, I'm bringing the beach to me (well it's more rivery....semi beachy....).

Disclaimer: technically I do live near a beach, but with headlines such as "Swim bans for 2 Chicago beaches due to E.Coli"....I think I'll pass.

Today's beach themed project:  Beach (okay RIVER) Rock Mat

About a year ago I purchased a few bags of black river rocks from the dollar store, with every intention of making a river rock epoxy table top like one I had seen in Miami.  I did not realize at the time, how lazy and poor I really am.  The table top never got made, and I don't foresee it being completed anytime in the near future.  So, now what to do with 3 bags of river rocks?  

I came across my inspiration:  CB2 Pebble Mat- Retailing for $44.95

I thought, yep I can make that.....and soon realized I wasn't alone.  I googled DIY pebble mat, and found literally hundreds of tutorials.  So, turns out this isn't a Kaitlin original idea.  I tried.

Here's the how-to:

Ikea "Borris" Door Mat- $1.49

+

6 Bags of Dollar Tree River Rocks- $6.00
+
1 Large tube E6000 glue (BEST GLUE EVER!)- $3.49
=


It's pretty self explanatory.  Glue the rocks to the mat in whatever pattern you like.  The glue works great, and the mat has a latex backing that keeps the mat in place, perfect for a bath mat.  Your first instinct might be- doesn't it hurt to walk on rocks?  No, you don't need to have callused superhuman feet to like this rug.  It feels like the spa has come to me every time I step on it.  Rajah doesn't think it's too bad either.


P.S. Detailed Miami adventure post to come soon....as soon as my fingers get the motivation to type another post.....
Pin It button on image hover