Sunday, November 27, 2011

Ornament Wreath

Happy Thanksgiving!!!

Thanksgiving is my second favorite holiday of the year...second to Christmas.  I attribute my love of the holidays to friends, family, and food.  Lots of food.  I have dreams of mashed potatoes, turkey, stuffing, and pumpkin pie.  This Thanksgiving did not disappoint. I ate so much I had to punch a new hole into my leather belt, no big deal.  I hope all of my readers had an amazing holiday, like I did!

I typically spend the day after Thanksgiving bargain hunting.  My sister and I used to pride ourselves on being super shoppers.  We would scour the ads and wait in the Best Buy line at 4 am in order to score the best Christmas gifts...but this year....this year I was not feeling it. I think I might be at a point in my life where I'm just too grouchy and tired to care about the $2 DVDs and $4 toasters, maybe next year.  So, instead I ate an entire bag of crunchers, watched Heavyweights, and decorated for Christmas.

My dad was nice enough to bring some of my Christmas decorations to the city.  He is always whining about how my sister and I have too much stuff in the garage at home, so I think he was eager to make some room.  I don't even know what decorations I have...so whatever he brought was going to be a surprise.

I opened bin #1:  Hundreds of round ornaments.

Bin #2:  Hold on...what is that?  That doesn't look like Christmas decorations....

DAD WTF.  He sent me a baby sinclair stuffed animal. 


Box #3:  PreLit Christmas Tree....with half the lights not working.
So, needless to say it was going to take some effort to get the apartment looking in tip top Christmas shape.  I turned on Christmas Pandora and got to work.

Today's tutorial:  DIY Ornament Wreath

I needed to find a way to utilize all of those round ornaments.  A while back I came across Eddie Ross's DIY Ornament Wreath.....this turned out to be a SIMPLE and cheap project.  It cost me $0.  I had all of the supplies on hand.  All I needed was a wire hanger, round ornaments, hot glue, and ribbon.

My current wreath was a little...lacking (Sorry to whoever's hand me down wreath this is....I think it has seen better days...)

I followed the instructions to a T.  It was so easy!  It only took me one hour, and one mug of peppermint schnapps +hot cocoa.

Hanger in the process of getting wreathified

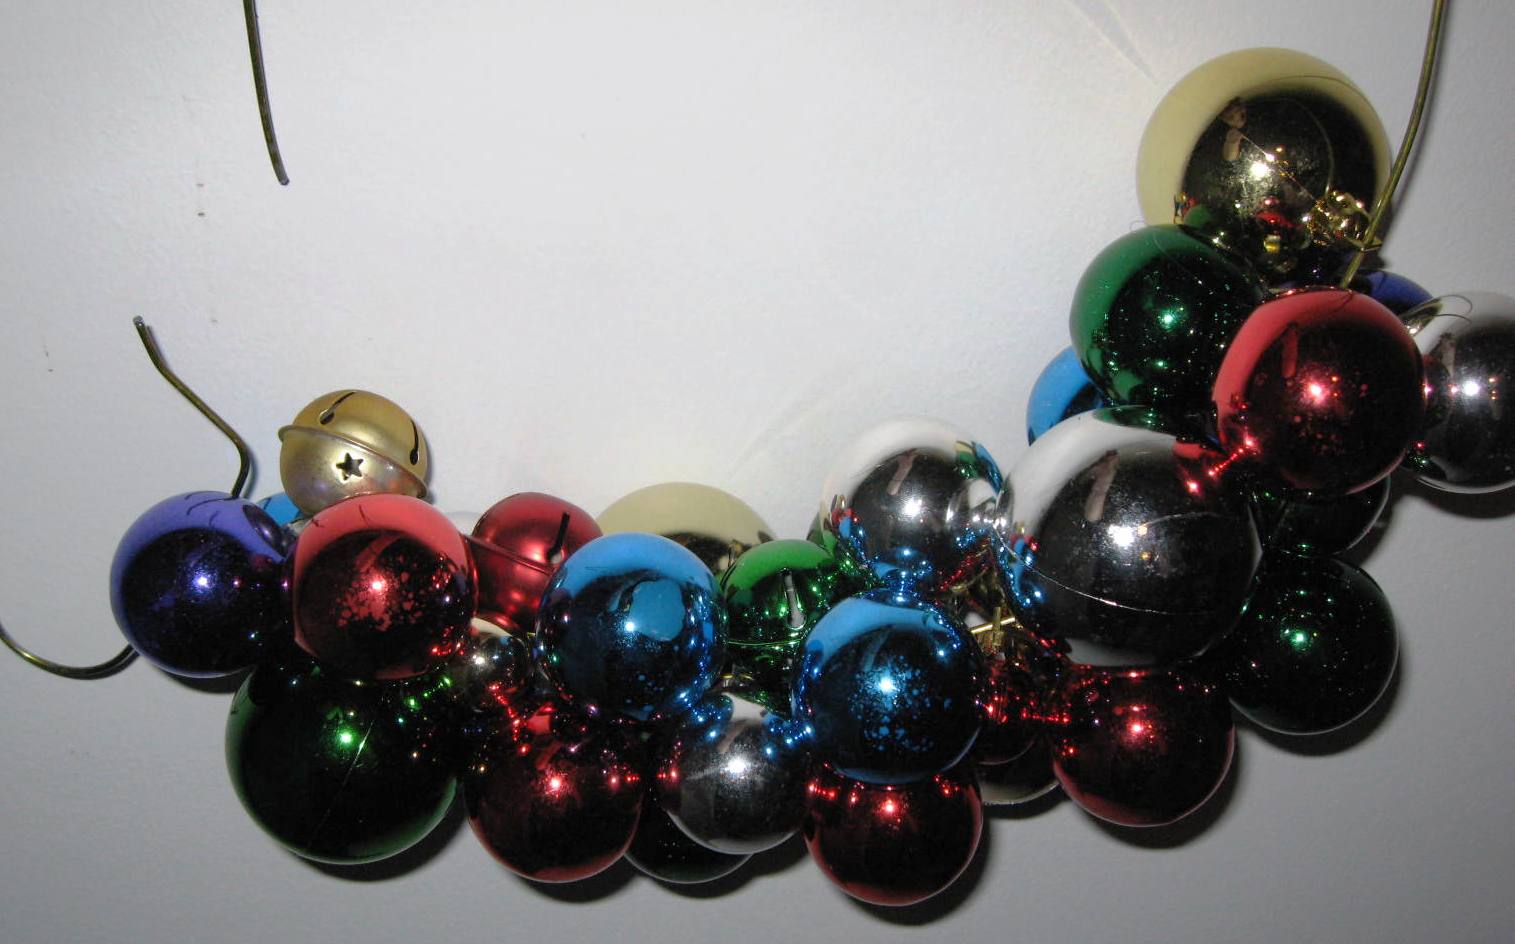
So BEHOLD, the final product:


LOVES IT!  Upgrade from the previous wreath.  I used the bow from the previous wreath to cover the hanger.  Another DIY wreath idea that is very similar would be to use vintage ornaments that you often can find for little to no money at estate sales and garages sales.

The Wreath Blog is a great place to get some inspiration (Mind you only inspiration...those wreaths are PRICY)!  The next time I score some vintage ornaments this will be a #1 priority!

Sunday, November 20, 2011

Welcome wagon

5 rotations down....6 to go!  I just finished my psychiatric rotation at Cook County...and can you believe it?  I liked it!  My entire life I've only had the opportunity to question my own sanity...so it was fun getting to question someone else's! I interviewed some interesting characters, but their stories may be a little too racy for my rated G blog, so I'll just leave it at that.

A month ago I mentioned my sister was here for the marathon, and I never got around to writing about some of the fun things we did.  Better late than never right?

First off, let me share a story of the past.  My sister does not visit Chicago all that often, so when she does I want to make it memorable.  The last time she visited we went for rooftop cocktails and had late night tacos.  At the end of the night, I made up a bed for her on the futon, then it was off to sleep.  It was so cute in the morning, Rishi my little grey kitten was snuggled up next to Erin (my sister)....however....wait for it....she awakens to discover he peed all over her. I mean really, who doesn't love the smell of male cat urine. Needless to say, I had to redeem myself (I can't speak for Rishi).

So, I was determined to have a nice bed for her this time.  I browsed amazon and picked out the perfect air mattress.  The one I decided on looked better than my own bed.  Queen sized, padded top, built in pump, and my sister was going to be the first one to try this baby out.  Once again, we blew up the bed, put some sheets on, and hit the hay.
Can you believe it deflated over night?  I really need to work on this hospitality thing.

Luckily I was able to make up for the bed situation.  Ever wondered what to do with all of those hotel shampoos, conditioners, lotions, etc?  I look like a hoarder with the bins and bins of sample sized junk I own.  To put these to good use, I made a care basket.


This how-to is pretty self explanatory. Get a tray, basket, bag, etc. and fill it with little personal care toiletries intended for your guest. The basket really makes your guest feel like they're at their own personal suite.  Okay maybe not...but it does give your guest little warm fuzzy feelings.


All in all, the visit was a lot of fun.  Here are some photo recaps:


View from the Willis Tower Skydeck
Let's play: Wheres Erin?

Erin doing awesome at mile 12

3D TRex movie at the Field Museum

Mom + Erin outside of the Field Museum


Come back soon, I miss you!

Sunday, October 30, 2011

Happy Halloween!

Let me preface this post by saying:  Sorry!  It has been over a month since I last posted.  I cannot believe how fast October came and went...I spent an entire month in Orthopedic Surgery....one month too much!  I had high expectations for Ortho....unfortunately I've found that 4am wake up times aren't quite my thing.

Anyways don't you worry.  I didn't completely fall off the planet over the past month, I'm always up to something, so there are plenty of posts to come over what I have been up to.

Moving on.....

It's officially the end of October...meaning my favorite time of the year!!!!!  HALLOWEEN!!!

I've always been a Halloween nut.  Apple cider, scary movies, costumes, pumpkins.  I can't get enough.  
  • AMC runs 24/7 programming called "Fear Fest", where they only play scary movies the two weeks before Halloween.  It's like crack.  I can't stop watching.  I think I've seen Halloween 4:  The Return of Michael Myers five times over the past week.  I promise you I will watch it again if it's on.  Scary Movies:  Check.

  • I've got apple cider in the fridge (I highly recommend Trader Joe's Spiced Cider).  Apple cider:  check.
  • I didn't have time for pumpkin carving this year...so I bought some pumpkin puree for pumpkin martinis....that counts right?
  • Now I'm only missing one thing:  a costume
I usually spend weeks planning and agonizing over the details of my costumes, or scouring the internet for ideas.  I just didn't have the time this year.  I tell you, PA school is turning me into an old lady.  Anyways, my mom gave me a costume book a year or two ago, the cover has little girls dressed as flowers.  Looked good to me.  

Here is the how to:

Supplies needed:
  • Two sheets of colored poster board (This is used to make the petals of your flower)- $2
  • One bouquet of fake flowers the color of your poster board- $3
  • Plastic 16-20" terra cotta colored pot- $10
  • Decorative butterflies- Optional- $3
  • Flower wire-$2
  • Green turtle neck- $8
  • 1-2" headband-  I already had one stored away...$2
Step 1:  Lug supplies all around the city of Chicago on crowded bus. Seriously.  You don't appreciate a car, till you don't have one...and you have to take smelly public transportation.

Step 2:  Cut out the bottom of the pot, so you can stick your legs through.  I have thunder thighs and didn't need a strap to hold up the pot.  If you get a larger pot, or have smaller legs you might want to consider adding rope or suspenders to hold up the pot.

Step 3: Trace out a petal shape onto cardboard.  Use this as a stencil.  Trace and cut out 10 petals on your colored poster board

Step 4: Glue wire length wise to the back of each petal. The wire helps support the petals, and also makes them malleable.

Step 5:  Affix the petals to the headband using the wire. (Poke hole through base of petal, place wire through hole and wrap around headband).

Step 6:  Deconstruct the fake bouquet, cutting the leaves and flowers off, so you have multiple flowers, and multiple leaves.

Step 7:  Glue flowers onto the petal headpiece.  Glue leaves onto sleeves of shirt.

Step 8:  Optional-  Wire the butterflies onto petals so they appear as though they are flying.


The end!  I must admit I really like the costume.  It took around 1-1.5 hours to assemble (I had some help...I used the promise of cosmos as a bribe).  Total cost- $28   This costume is not exactly.....bar appropriate.  I didn't really blend in with the other girls...meaning I had on more than a bra and panties.  Also, the headpiece was a little...large.  I was getting knocked around like a football player.  

What are you planning on being for Halloween?

Sunday, September 11, 2011

How do you like them apples?

I'm so uninspired today, I don't know how interesting of a post I can produce. It's 9/11, the Bears just won...but I've got nothing.  My brain might just be fried.  I spent the weekend grocery shopping and studying....the life of a city girl is unbelievably exciting.

N and I came home with quite the load yesterday.  Fruits, veggies, breads, brownies, you name it we got it.  I love a full fridge.  I can't wait to make some fall recipes...... pumpkin pie, apple cider, apple pie......
I'll be sure to post when I make them cause I'm sure it will be disastrous.

At least I'll look cute doing it, thanks to my good friend Jenna who visited this weekend and came bearing gifts!  She gave me this little ruffled apron....  Loves it!  Now I'm kitchen ready.


As mentioned I plan on making some divine apple desserts this fall, so I needed a cute little table top bowl to store all of my apples!  I found the inspiration blog:  Every Creative Endeavor.  The blog wasn't really inspiration, as it was more "follow directions to a T".  I had no creative input for this project.   I purchased 50' sisal rope from Ace and got out my handy glue gun...behold the final product:


I followed her tutorial, but I suspect I used too large of a pyrex bowl as a mold.  I like the final product....but it's a little wonky. In retrospect I probably would have just purchased a clear bowl from the dollar store and glued the rope to the outside.

For now I'm happy with my table top apple bowl...but I'll like it even better when it's empty and the apples are in pie form.

Saturday, September 3, 2011

Apt. 913

Happy Labor Day Weekend Ya'll!  I hope you have more exciting plans than me....staying at home with the cats.  Perhaps perusing the Chicago Jazz Festival.

So many of my friends are out of town or on vacation this weekend....good for you.  I'm jealous.  Since I can't leave my tiny little apartment, I'll just reminisce on previous vacations.

Have you ever been to Sweden?  I have!  My grandparents took me on a Scandinavian vacation 3 years ago...Denmark, Finland, Sweden, Norway, Russia.  It was amazing.  Did you know IKEA originated in Sweden?
I <3 Sweden

I had a complex the whole time.  Swedish people are ridiculously good looking. Tall, thin, and blonde.  All of them.

So, a few months ago when my wooden IKEA bed slats cracked in half, I wasn't surprised ( I guess I was a little surprised- I know I'm a weight watchers drop out...but cracked bed slats...come on!).  I attributed the destruction to fat America- Swedes just aren't used to having to accommodate all that extra poundage.  The slats were eventually replaced, and since I plan on being on Hoarders 20 years from now, I couldn't bear to part with the old wooden slats.  So on to the balcony they went.  I just knew someday they would come in handy.

A few months ago I saw DIY Nail House Numbers via curbly
I adored the look.  A couple problems:  I don't own a home, I rent +  I have nowhere to nail numbers outside of my apartment.  I mean, I guess I could...if I wanted to lose my security deposit.  No thanks I'm poor enough as it is.  I was determined to bring the nail/industrial vibe to my apartment, so I thought I could turn the house numbers into art!
  
Step 1: Gather wood and cut to size.  The ikea slats were perfect for this project, they just needed to be cut down, since they were a little long.  I was uber excited to finally be able to use my jig saw.  Some girls get excited over nail polish....I get excited over saw dust.  Don't judge me.


This is my sad work area. Thanks for the drill dad :)

Step 2:  Sand and stain wood.  Affix 4 wood planks together.
I used ebony stain I had on hand. My finger nails were stained for the next 48 hours.  My patients probably thought I never wash my hands.

Cut and sanded, ready to be stained
Post ebony stain
3.  Print Template.  I decided I wanted to nail "913" (my apartment number) onto the planks.  It wouldnt be too hard to do initials, or short words either.  I used the font "Gunshot" in size 850 via Microsoft Word
4.  Start screwing/hammering in nails or screws around the template.  I used black drywall screws purchased for $5.95 box/350 screws.  Once done with the outline, remove the paper
**I initially purchased 3 boxes of black Mason Nails.  Rookie mistake. Maybe they would have worked if I was Paul Bunyan....
Start by screwing in around the borders
Remove the paper when done with the borders
5.  Fill in the gaps with remaining screws
6.  All done.  I understand it's not everyone's cup of tea, but I'm in love.


Sunday, August 28, 2011

Jersey City

Labor day is in a week, so what does that mean?  My favorite season is almost here!  I <3 Fall.  I love seeing the leaves change, and enjoying the fall breeze in Chicago.  I don't necessarily enjoy the fact that I know what season comes after fall....but let's keep on topic!  Fall!

Two essential reasons why I love fall:

  1. I'm one season closer to being done with school (I finished OB/GYN on Friday- that means:  No more stinky warty vajay jays in the forseeable future!! I tell you- some of the things I saw should be on scared straight: abstinence edition.)
  2.  I get to wear layers and layers of clothing without being questioned on why I'm not living at a homeless shelter.


Fall clothes are the best.  Jackets, sweaters, boots, you name it, I love it. Summer time is misery.  I  look like Casper the ghost, and people know it....but in the fall....in the fall I can cover up my pasty legs and chicken fat arms and people are none the wiser.

An essential accessory to any fall wardrobe:  The scarf.  I have a love affair with scarves; I own one in nearly every color.  They're versatile-  Use them on an airplane as a pillow.  Use them on the CTA as a breathing device.  Oh yeah, use them for warmth.
Last week I was google image searching and came across DeWanda's Braided Loopina Scarf.

It was love at first sight.  I wanted it NOW....but the page was in German.  I can barely speak Spanish, sometimes I even have trouble with English...German noway.  I did my best to translate, and found the fabric is a cotton jersey. The scarf retails for 35 euros, aka $50.  I often second guess myself spending $1 on a McDonalds cheeseburger, so $50 on a jersey scarf ain't gonna fly.

Time to get creative.

Step 1:  Gather Fabric.  I searched online for jersey fabrics; I was having a hard time finding cheap gray jersey material...and then it hit me!  A year ago I purchased a Gray jersey sheet set from Kohls for $12.  Super cheap, super comfy!  I HATE flat top sheets unless they are really nice material, so stored away in brand new condition was exactly what I needed!
2.  Cut material.  The size of the material strips is up to you.  I cut two 8"x60" strips and two 4"x60" strips  (The flat sheet measured 80"x60" so I cut the entire width of the flat sheet). 

  •  From the 4 strips, I further cut those down to size.  Leave one 8" strip untouched, and one 4" strip untouched.  Cut the remaining two strips into thirds length wise (ex. one 8" strip turns into 3-  2.5"x60" strips)

3.  Braid the two sets of strips just cut

4.  Sew the ends of the braids together to make a loop. (so you will have two sets of looped braids)
5.  Sew the ends of the 8" jersey together.  Sew the ends of the 4" jersey together.

Note:  While I have dreams of being the next winner of Project Runway, my sewing skills are more along the lines of ... kindergartner.  Michael Kors would be disgusted and Heidi Klum would tell me I'm out.  Just do as I say...and not as I sew.
8" strip with ends sewn together
6.  Gather/bundle all 4 sets of strips/braids at the areas you sewed.  Cut a square piece of jersey wide and long enough to tie and cover the sewn areas.  You can either sew the square on...or be lazy like me and knot it on.

You can make it a little prettier by sewing the jersey on...but my time is precious!

7.  Voila!  $50 scarf meet Kaitlin's free remnant wannabe.
The great thing about this project is that you can customize!  Make as many braids in as many sizes and colors as you want!  If you go my route...a flat sheet will make about 3 scarves....perfect for gifts.....who wants one?


Saturday, August 6, 2011

Fit For A Queen

Week 1 Summary of Labor and Delivery:
Smooth sailing...smooth sailing....new attending physician....Lake Michigan during a storm sailing.

Allow me to recap- Scenario #1- Morning Rounds:
Attending:  Tell me about patient X
Me:  Patient X is a 20year old G2P1102 NSVD at 39w1d with hx of thrombocytopenia
Attending:  Describe the etiology of thrombocytopenia during pregnancy
Me:  Um Um....low platelets....*desperately looking for someplace to hide, or a code blue button to push*
Attending: AND
Me:  Eyes bulging, sweat forming.....At this point all I could think of was running down the hall frantically crying....I think I mumbled something about DIC and purpura

This situation ended with her giving me the answer, and me surviving pimp scenario #1.

Scenario #2:  Operating Room- Cesarian Section
Attending:  "Suction the blood in the area I'm working"
Me Thinking:  Yay I get to do something, I'm in the big leagues, I get to suction!
Attending:  NO you're suctioning the wrong area, suction where I'm working
Me Thinking:  OH NO!  I'm not suctioning right, all I have to do is suction and I'm not suctioning right!  MUST Suction right, MUST suction right.
* Trying to suction where she is working, without suctioning the skin off her fingers*
Attending: No no, just give it to the resident, resident suction for me.

FAIL. I am being overly dramatic.  I survived, and got to do and see ALOT of cool things ( I later got to retract, staple, and generally make up for my lack of suctioning skills). If I could do everything, and know all the answers I wouldn't be a student.

But, this leads me to my point- After a long day of getting "pimped" there is nothing I look forward to more than my nice comfy bed, which recently got a little makeover.

When I moved this summer I left my little twin bed behind and moved on to greener pastures in the form of a queen sized Ikea Heimdal Metal Frame Bed: $129.

 I KNOW, you don't need to tell me....it is a little...lackluster.  BUT I challenge you to find a modern bed that is affordable.  They just don't exist, I promise you.
Clearly this bed was not making the mark-  I have always wanted one of those Alice in Wonderland type headboards, where you feel like you're sleeping in the Ritz Carlton...and not a $129 Ikea bed.  So, I set my mind to  making a new headboard to spruce things up.

Inspiration: West Elm Diamond Tufted Headboard $449


There are so many tutorials on how to make a DIY tufted headboard- but this is Kaitlin's one of a kind Ikea Headboard Hack

Materials:

  • Fabric- I used 3 yards of Ikea Gray Linen Fabric $18, and there was plenty leftover
  • Plywood (Free! Thanks dad!) 
  • Button Kit- I ended up making 22 buttons, I purchased the kits from Joanne Fabrics for $16
  • Spray Adhesive
  • 1.5-2" Foam- I used a full size foam mattress topper (egg crate topper) purchased at Walmart- $11
  • Long strong tufting needle, and strong string/twine
  • Staple Gun- Purchased at Home Depot- $11
  • Batting- Sized large enough to cover the plywood
  • Plastic zip ties
This was my starting point:  Stop judging me.  Not everyone has an immaculate bedroom.

Step 1: Cut plywood to desired size
From the beginning, I knew I wanted to keep the bedframe.  The only dilemma was that in order to keep the frame I HAD to keep the headboard, or the bed would be missing two legs.  So, I cut the plywood to fit the size of the current headboard.  The pictures below may give you a better idea of what I mean

Step 2: Mark the spots where you want the buttons to go on the headboard, and drill holes large enough to fit the tufting needle
I also drilled holes where I was going to tie the current headboard to the plywood --See pictures below

Step 3: Affix the plywood to the metal headboard frame using plastic zip ties


Step 4:  Remove headboard frame +Plywood from the rest of the bedframe
See!  The bed wouldn't have legs without the headboard frame!

Step 5:  Cut the foam to size.  Using spray adhesive, adhere foam to plywood
Sorry I forgot to photograph this step. My bad.
Step 6: Cover the foam/plywood with batting.  Staple OVER the metal frame.
Step 7: Cut the fabric to size and cover the batting with fabric.
Once again, staple over the metal and batting. Take special care with the corners.  I stapled them as if I was wrapping a Christmas present. You can stop here if you are too lazy to tuft, but I'm a go-getter!

Step 8:  Make buttons with left over fabric.
This step is painful, just follow the directions on the package. If I never see another button kit in my life, it will be too soon.
Step 9:  Sew the buttons on. 
This is where the previously drilled holes come into play.  Thread the needle, insert it through the previously drilled hole in the plywood, through the foam, batting and fabric, and out the front.  Thread the button onto the thread and guide the needle to the back. Put some muscle into it so the tufts are deep.  Staple the thread to the plywood.
Behold:  My bed fit for a queen.  Don't mind the ugly bedding and pillows....future posts to come!  I can't put all of my eggs in one basket....
Behold my $75 Masterpiece (and my incredibly awful photoshop attempt to cover up my disaster bedroom....)

Update:  Here is a slightly better picture one year later...still holding up well...even though my cats have decided it is a great scratching post alternative....

Pin It button on image hover