So many of my friends are out of town or on vacation this weekend....good for you. I'm jealous. Since I can't leave my tiny little apartment, I'll just reminisce on previous vacations.
Have you ever been to Sweden? I have! My grandparents took me on a Scandinavian vacation 3 years ago...Denmark, Finland, Sweden, Norway, Russia. It was amazing. Did you know IKEA originated in Sweden?
I had a complex the whole time. Swedish people are ridiculously good looking. Tall, thin, and blonde. All of them.
So, a few months ago when my wooden IKEA bed slats cracked in half, I wasn't surprised ( I guess I was a little surprised- I know I'm a weight watchers drop out...but cracked bed slats...come on!). I attributed the destruction to fat America- Swedes just aren't used to having to accommodate all that extra poundage. The slats were eventually replaced, and since I plan on being on Hoarders 20 years from now, I couldn't bear to part with the old wooden slats. So on to the balcony they went. I just knew someday they would come in handy.
A few months ago I saw DIY Nail House Numbers via curbly
I adored the look. A couple problems: I don't own a home, I rent + I have nowhere to nail numbers outside of my apartment. I mean, I guess I could...if I wanted to lose my security deposit. No thanks I'm poor enough as it is. I was determined to bring the nail/industrial vibe to my apartment, so I thought I could turn the house numbers into art!
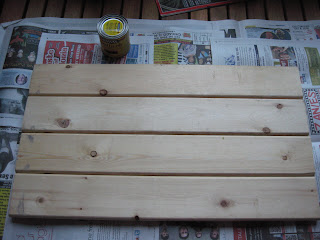
Step 1: Gather wood and cut to size. The ikea slats were perfect for this project, they just needed to be cut down, since they were a little long. I was uber excited to finally be able to use my jig saw. Some girls get excited over nail polish....I get excited over saw dust. Don't judge me.
 |
| This is my sad work area. Thanks for the drill dad :) |
Step 2: Sand and stain wood. Affix 4 wood planks together.
I used ebony stain I had on hand. My finger nails were stained for the next 48 hours. My patients probably thought I never wash my hands.
 |
| Cut and sanded, ready to be stained |
 |
| Post ebony stain |
3. Print Template. I decided I wanted to nail "913" (my apartment number) onto the planks. It wouldnt be too hard to do initials, or short words either. I used the font "Gunshot" in size 850 via Microsoft Word
4. Start screwing/hammering in nails or screws around the template. I used black drywall screws purchased for $5.95 box/350 screws. Once done with the outline, remove the paper
**I initially purchased 3 boxes of black Mason Nails. Rookie mistake. Maybe they would have worked if I was Paul Bunyan....
 |
| Start by screwing in around the borders |
 |
| Remove the paper when done with the borders |
5. Fill in the gaps with remaining screws
6. All done. I understand it's not everyone's cup of tea, but I'm in love.


No comments:
Post a Comment