Wednesday, December 5, 2012

{25 Days of Christmas} DIY Paper Mache Holiday Deer Head


Please be advised:  No animals were harmed in the making of this holiday decoration.

Everyone, say hello to Lil Wayne, the newest addition to Apt. 913.  Isn't he just the cutest?  All he is missing is a shiny little red ornament nose and he will be complete! Maybe I should give him a grill.....

ANYWAYS, I have wanted to make a cardboard deer head for awhile now, but I really had no room or need for a cardboard animal decoration...UNTIL NOW! I knew as soon as I saw Pottery Barn's Resin Stag Head Christmas decoration, it was on.  $299 PB Head, meet Kaitlin's FREE Lil Wayne.
Pottery Barn's Resin Stag Head $299

Materials:
-Cardboard or foam board (Foam board looks prettier, but cardboard is easier to cut)
-X Acto Knife
-Elmers Glue
-Tape
-Newspapers or Magazines
-Paint
-Wrapping Paper
-Flour

Steps:
1.  Go to Chronicle Books Blog.  Print out the deer head template, and follow her directions for building the deer head cardboard foundation.  I used foam board leftover from my cat bed project, but I think ultimately if you are going to paper mache you can use cardboard since it is easier to cut, and you wont see any of it when it is covered with wrapping paper.

2. Glue the pieces together to create a sturdier foundation.

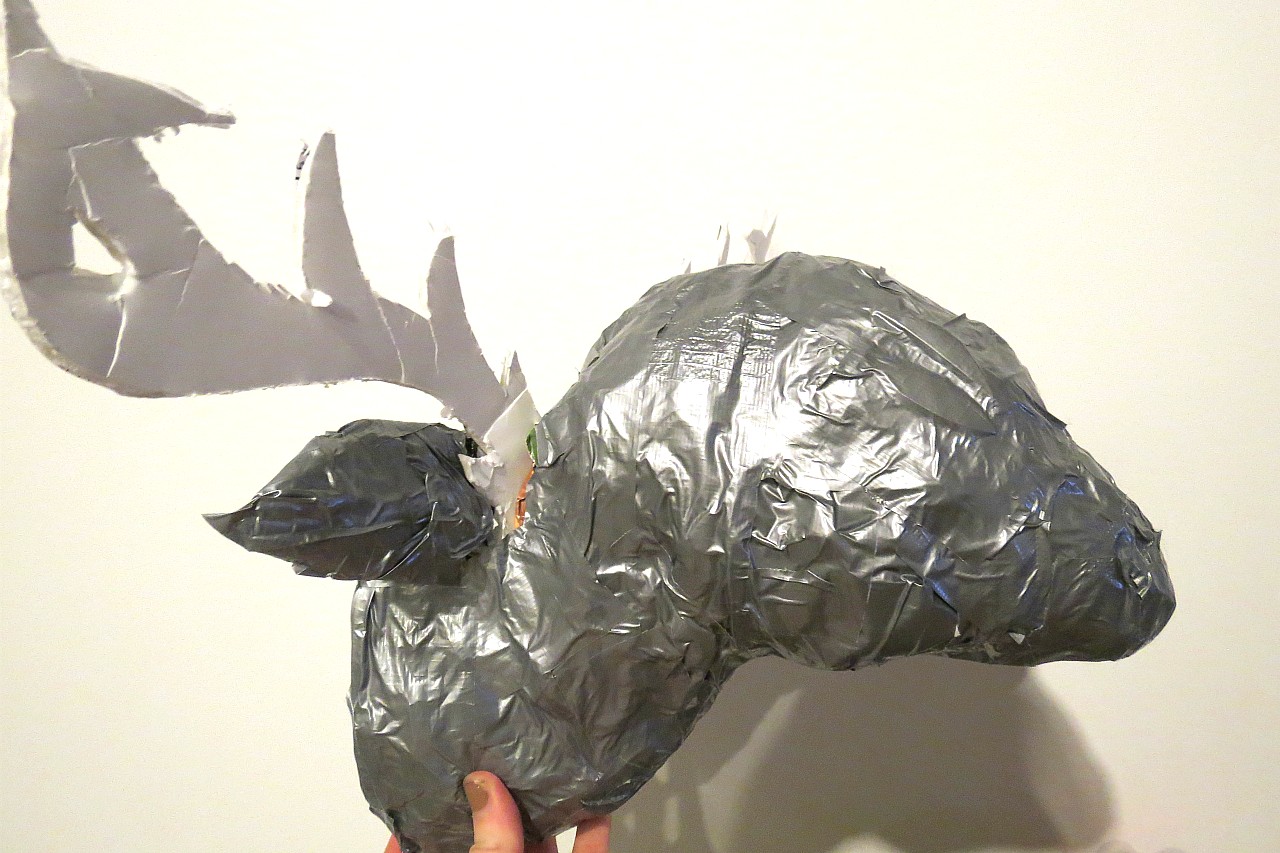
3.  Begin forming your deer head and neck by crumpling up magazines/newspapers, and taping them to the cardboard deer form. As you can see I added some ears to my deer...and I attempted to add eyes, which made wayney boy end up looking like an alien....


4. Cut strips of wrapping paper for the papier mache. 

5. Prepare the papier mache mixture. I boiled together 1 part flour to 5 parts water.  It worked well.  The first time I made the mixture it was a little clumpy.  The second time I got it right.  Boil the mixture while continually stirring.  Once it looks liquidy or almost soupy it is ready.  Transfer the mixture to a cool bowl, and allow to cool for a minute or two. 

6.  Dip your wrapping paper into the papier mache mixture.

7.  Begin covering the head and antlers with the paper. Smooth your strips down, and try not to do any more than 4 layers. I did half the head in one sitting, allowed it to dry, then worked on the other half. 

Please excuse my man hands! Part woman, part horrible beast.

8. While your deer baby is drying, cut a shield out of cardboard, then paint with a color of your choice.  I chose a burgundy color.  I reinforced the back of the shield by gluing on a second piece of cardboard.

9. Once the deer is dry, and the paint from the shield is dry, attach the deer head to the shield.  I was tired of gluing and ended up just nailing my head to the shield, but of course you can use glue, or whatever other means of attachment you can think of.

10.  To finish him off I put my moss wreath around his head and called it a day (until I remembered I forgot the red nose! womp womp)

Anyways, this is le monsieur Wayne. Loves him in all his wrapping paper glory.


Be sure to check back tomorrow for more holiday ideas and DIYs!

Monday, December 3, 2012

{25 Days of Christmas} $3 (or less) Moss Wreath


I know what you're thinking, wreaths two days in a row???  But really, this baby looks adorable, and didn't cost me any money since I already had all of the products on hand.  Even if you have to buy the moss and the ribbon (you probably already have the other materials) this makes for an adorably inexpensive  holiday decoration (Consider changing the bow to transcend holiday seasons, moss wreaths are perfect for the spring!)

Materials:
-Old Magazine Pages/Newspaper
-Cardboard
-Tape (Preferably dark green, but any color will do, I used silver duct tape and it worked just fine!)
-Elmers Glue
-1 package of moss (available at the Dollar Store, I had mine leftover from my terrarium project)
-Ribbon (Optional)

Let me preface this by saying that you can obviously buy a wreath form and cover it with moss and glue, but if you want to be like me a scour your apartment floor's recycling bin, then your best bet is to go the cardboard/magazine route, since it's free!

Steps:
1. Cut the cardboard into desired size.  I used a shape print out in Publisher, and traced/Exacto knifed the cut out.


2.  Crumple up sheets of newspaper or magazines and arrange them around the wreath form


3. Tape the magazine pages to the wreath form.  Fill up blank spaces with small pages of newspaper or magazine.  Try to make the entire wreath uniform.


4. Apply the elmers glue to the wreath form.  I spread the glue thinly around with my finger, then applied the moss directly onto the glue.  If the moss is in clumps, pull it gently to stretch it out in order to get more coverage.
Sorry, my fingers were too gluey to take a picture!

5.  Apply small leftover fragments of moss to any bare areas.  This is why the green tape would work best, as it would conceal any bare spots, however mine were none too noticeable even with the silver tape

6.  Apply a bow, and voila! Hello Freebie/Cheapy Beauty!


Decorations don't have to be expensive in order to make a statement!   As a big thank you to my readers, I'm offering a 10% discount in my Etsy shop, just use the code HOLIDAY10.  Be sure to check back daily for more holiday tips and instructions.
Pin It button on image hover