
May was the month that came and went. I packed, I moved, I cleaned, I repeated. There has been so much going on that I haven't taken any pictures or uploaded any of the projects I have been working on, but I promise next week someday I'll get around to it. Until then, I'm going to focus on the "stethoscopes" part of this blog that I so often neglect.
As the weather starts to get warmer I've noticed hem lines getting shorter and skin tones getting darker. I *cringe* at the thought (my cellulite and paper white legs only being two very small reasons....). The main reason I start to cringe is carcinoma. That's pretty much just a fancy word for cancer. The second HUGE reason I grab a jacket and a wide brimmed hat when I go outside is rhytids. Again, pretty much just a fancy word for wrinkles.
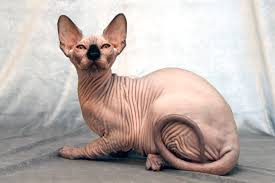
Consider this my public service announcement. If you don't want to look like a hairless cat by the time you're 35, you should take the time to do a few things before you enjoy the sweat inducing summer temps.
As the weather starts to get warmer I've noticed hem lines getting shorter and skin tones getting darker. I *cringe* at the thought (my cellulite and paper white legs only being two very small reasons....). The main reason I start to cringe is carcinoma. That's pretty much just a fancy word for cancer. The second HUGE reason I grab a jacket and a wide brimmed hat when I go outside is rhytids. Again, pretty much just a fancy word for wrinkles.
Consider this my public service announcement. If you don't want to look like a hairless cat by the time you're 35, you should take the time to do a few things before you enjoy the sweat inducing summer temps.
- Wear sunscreen. Everyday. Even if you're not planning to go outside. Reapply often and when purchasing look for broad-spectrum sunscreen with UVA and UVB protection and an SPF higher than 15.
- Want to avoid crows feet (those cute little wrinkles extending from the corners of your eyes)? Wear sunglasses every time you drive, go outside (they also help to prevent those pesky things called cataracts)
- Unless you want to look like Patricia Krentcil a.k.a. tanning mom, never ever ever step foot inside a tanning salon (I KNOW- I went through a period of time where Snookie had NOTHING on me. But do as I say and not as I do. My skin will definitely be paying for my stupid mistakes in the near future). Want to look tanned but want to avoid the salons? Invest in some nice non-stinky non-orangey self tanning solution. The self tanners/bronzers have come a long way (I use Loreal's Sublime Bronze..it's cheap, it does the job, and I turn brown without all of the associated risks)
Here is Oprah's guide to the best new bronzers, big O is never wrong is she?
4. Go all boho chic this summer meaning, look like a homeless person and grab as many layers as possible. Wear a wide brimmed hat. Wear sunglasses. Wear a light weight cardigan. Basically cover up. Leave something everything to the imagination.
5. If you ever notice a mole that seems to not go away or keeps getting bigger, a lesion that doesn't heal, etc....go see your dermatologist or local PA. Trust me, these are not things you want to put by the wayside. Look for the A,B,C,D,Es of skin cancer: Asymmetry, Border irregularity, Color change, Diameter enlargement and Evolution/Elevation.
Follow these guidelines and you'll continue to look flawless for years to come. If you don't then you *might* be paying me a visit soon that expected.
P.S. Wondering what a hairless cat looks like? Totes not cute. Stay out of the sun yo.


