
So with the weather slowing starting to change, and my wardrobe transitioning from summer to fall....I have only one thing on my mind. FRINGE.


I live a block away from a Zara store and saw the love of my life...okay not really....but I saw this black leather fringe skirt. I suddenly had visions of me as Tina Turner dancing on the counter at Drumbar singing Proud Mary...but I digress. I did not buy the skirt, because alas, I am unemployed. Unemployed people should not be buying fringe skirts....or going to Drumbar...but everyone has their vices.
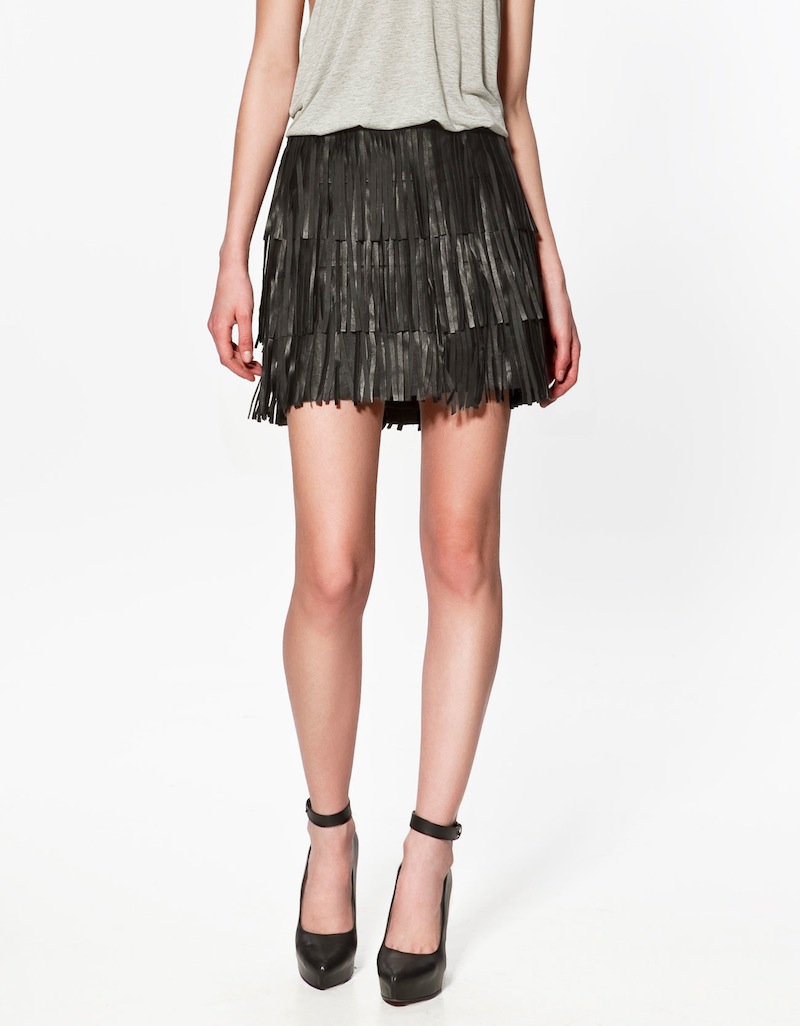 |
| Zara Black Fringe Skirt $179 |
 |
| Forever 21 $22.80 |
So naturally, when I was browsing the Impeccable Pig for some fall ideas, I started salivating when I saw the fringe infinity scarf, all $32 of it.
 |
| Fringe Infinity Scarf available at theimeccablepig.com $32 |
Now, I am no newbie to fringe scarves, but this one called to me. It was screaming "Kaitlin make me, make me Kaitlin". Clearly I'm delusional from sitting in my apartment for days on end. Anyways, lucky for me I had just set aside a Forever 21 jersey maxi dress to be sacrificed to Goodwill. Ideal for slicing and dicing.
So, without further ado....let me show you the steps to make a Fringe infinity scarf for just pennies (or in my case free!)

As mentioned, I made my scarf from an old jersey maxi dress. I bought this beauty of a dress for $13.99 at the beginning of the summer. It was ideal for warm weather, and was the perfect length. Fast forward to the first washing....and it shrunk a FOOT. I guess you get what you pay for...which in my wardrobe's case...isn't much.
Anyways, any fabric can be used to make the scarf. I used a dress, but of course you can use an old t shirt. Check out Lakeland Local and see a great tutorial on how to make the scarf from a tshirt versus a dress. If going this route my recommendation would be to:
- Use a men's t shirt, or a very large sized T for the extra fabric
- Consider using two tshirts to make multiple layers, as a single t shirt is somewhat flimsy and doesn't layer well.
Step 1: Cut material.
Cut the dress into 3 sections. I cut below the upper bodice, and then divided and cut the lower skirt portion into two sections. I discarded the upper portion, and kept the two "rectangular tube" lower skirt portions.

Step 2: Begin cutting the fringe portion. Cut vertical strips on each skirt portion. Keep each piece of fringe the same length, however how long you make each strip is up to you, as long as you keep them uniform.

I made my fringe relatively thick. To thin the strips after cutting and assembling, you can pull on the strips which will thin and elongate them. In retrospect, I would have make my strips longer.

Take both tubes after they have been "fringed" and put them on over your head. Arrange them how you see fit (so it lays properly, is layered correctly, etc.) then tie the two pieces together where they would normally lay at the back of you neck with left over fabric.
then...that's it! you're done! Mine needs a little 'jujjing'...because I cut the strips too thick..but after a little tugging and pulling...I think it will be a grade A infinity scarf!


